Storage Box
I love the idea of a storage box. I love the thought of organizing my crap into pretty little boxes, all appropriately labeled and neatly tucked away in my house. Unfortunately, I have spent loads of money on pretty little boxes and have organized them my way, so they are completely useless. I am tired of spending a lot of money on these freakin’ boxes, and I’ve been seeing a lot of homemade storage box projects on Pinterest lately. All of these projects involve spray adhesive, neatly cut fabric, and a shitload of time that I do not have to spend on making a shoebox look pretty.
Here’s my take on a homemade designer storage box. I’m not claiming that it will be pretty on the inside, although I’m sure by spending a little more time you can get it there. Also, it probably won’t look absolutely seamless and perfect on the outside, hence the busy-patterned contact paper required to make it (see below). But to make a big box look pretty enough to store your mess, it takes 20 minutes and $5-$10 (not including the price of the fabulous goodies that came in the box).
First, I would like to thank my shoe obsession and Lucky Brand.
Here is what you’ll need:
- Box of your desired size
- Roll of self-adhesive contact paper or shelf liner with a busy pattern (I found mine at Target)
- Scissors
- Rubber spatula
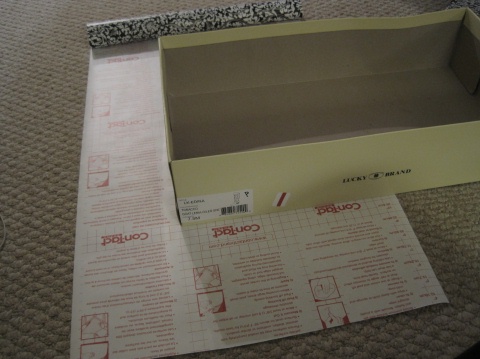
Place the box open side up on the contact paper, and cut the contact paper large enough to wrap up the sides of the box, over the edges, and into the inside. It’s ok if the contact paper can‘t cover the entire box with one cut. I used two strips to cover the outside and lid of the box.
Once you cut your piece, peel the backing off of the adhesive, and lay sticky-side up on the floor. Carefully place the bottom of the box down on the paper (orient it the way you cut the piece to fit), and press down the bottom of the box firmly to adhere to the paper. Wrap the paper up and over the sides of the box, using the spatula to smooth out any bubbles, and fold the paper neatly (like you are wrapping a present) as needed. Repeat these steps with the box lid.
At the tip of the arrow, you can see where I folded the paper like I would if I were wrapping a present.
Use the spatula to smooth the paper. Using the tip of your scissors, pop any large bubbles and smooth down with your fingers or the spatula.
My box was the perfect size to store my AWESOME Thomas and Friends DVD collection.
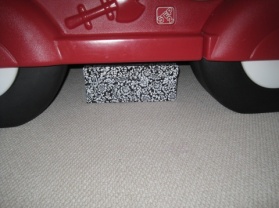
Ultimately I used it to store my son’s extra blankets, and it fit neatly under his bed.
And there you have it! Feel good about yourself, you just recycled and put your energy toward being organized!


